When it comes to appreciating the quality of a piece of jewelry, there are three major things you must look for:
-Base metals
-Gemstones
-Craftsmanship
Stamping
By law, in the United-States, jewelry items have to be marked with a metal purity hallmark.
Usually, hallmarks are found on the clasps of a bracelet or a necklace and inside the rings.
This can vary though: as an example, the rings made in France sometimes bare the stamps on the side or on the outside of the shank.
Sometimes, the marks are tiny in size and require the use of a magnifying glass or a loupe to observe their detail.
Below is a list of hallmarks commonly used for marking jewelry:
-24 Karat Gold – 24K or 999
-22 Karat Gold – 22K or 917
-21 Karat Gold – 21K or 875
-18 Karat Gold – 18K or 750
-14 Karat Gold – 14K or 585
-10 Karat Gold – 10K or 417
-9 Karat Gold – 9K or 375
-14 Karat gold-filled – 14K GF or 14K/20
-14 Karat gold plated- 14K GP
-Sterling Silver – 925
-Pure Silver – 999
Platinum Stamping
Jewelry that contains 850, 900 or 950 parts per thousand of pure platinum may be marked “Plat” or “Pt” if a number is used in front of the term to disclose the amount of pure platinum in the alloy, such as:
-“850 Plat” or “850 Pt”, or
-“950 Plat” or “950 Pt”
-Jewelry that contains at least 950 parts per thousand of platinum group metals, with at least 500 parts per thousand of the total pure platinum, may be marked as platinum as long as the numbers of each metal are disclosed.
For instance,
-“600 Pt. 350 Ir.” or 600 Plat. 350 Irid.” for 600 parts pure platinum and 350 parts iridium
-“550Pt. 350Pd. 50Ir.” Or “550Plat. 350Pall. 50Irid.” For 550 parts pure platinum, 350 parts palladium and 50 parts iridium
Gold Filling and Gold plating
Gold-filled is also called rolled-gold.
The jewels are made of base metal (usually brass or copper) covered by gold sheets in a mechanical bonding process.
The gold content is 5% or 1/20 of the total weight.
Traditionally made with 14k gold, it is hard-wearing.
With reasonable care, it will not peel or flake and last as long as solid 14k gold.
It is safe for most people with sensitive skin.
Gold-filled is 10kt or higher karat over a base metal.
Gold-plated is a base metal such as steel or brass dipped into a bath of electroplating solution, with a lump of solid gold.
When an electric current is applied, a thin layer of gold is deposited on the metal.
Gold plate is 10kt or higher over a base metal.
The gold layer is less than gold filled, quite thin, and will wear off faster than gold filled.
Depending on the piece, stones can be accountable for the biggest part of the value.
Just think about a ring containing 6 grams of 18k gold, set with a nice 1,5-carat princess cut diamond and two gorgeous 1
carat heart-shaped “pigeon blood” Burma rubies: the value of the metal becomes literally insignificant!
Even if you haven’t had a gemology formation, you can roughly say if some stones seem to be of good quality or not.
Of course, there is nothing like a 10X magnifier with proper lighting, or even better a microscope but with basic tricks and knowledge in mind, you can get a pretty good idea of the stone you behold.
Step 1: Symmetry and quality of the cut
If the stone you are looking at is set in prongs, you shouldn’t have too many problems noticing symmetrical abnormalities, except maybe for the pavilion.
Put the stone sideway between your eyes and a contrasting color; turn it slowly.
This way, you should be able to see deformities in the general shape.
Then, look straight from the top (crown) of the stone to try to locate asymmetries in the faceting.
Next, make the light run on the facets to find polishing irregularities.
At last, try and feel if the overall reflections and sparkles glitter uniformly through the stone.
You might want as well to assess in colored gemstones the light extinction areas, as well as any windowing.
Depending on the setting type, assessing the cut of a stone can be quite tricky.
Nevertheless, especially if you are facing a stone of considerable size, it should be possible to get a rough idea of the cut’s quality.
Step 2: Clarity
Looking straight at the top of the stone (table), you can try to find some cracks or inclusion in the stone.
This can be quite hard without proper instruments and lighting, especially when it comes to diamonds as well as dark stones.
It’s still worthy of trying though, because you might get some surprises!
Colored precious stones very often have inclusions, especially emeralds.
When you face such pieces, it can be good to pay attention to structural weaknesses, particularly around the setting: setters sometimes try to hide imperfections with the setting, but it can be compromising the structural integrity of the stone.
Step 3: Color
For diamonds, it’s easy: the less color, the better.
Except, obviously, if you are facing a fancy color diamond!
A well-balanced tone with a strong saturation of the hue (color) is the sign of rare and valuable colored gemstone or colored diamond.
If you have seen a few beautiful ones in your life, your eyes will remember and judge the other specimens easily…
Step 4: Carat
Unless someone tells you the weight of some stones directly, it will be tough for you to judge with your eyes, especially for colored gemstones. Diamonds, especially round ones, are a bit easier to guess. Having access to measuring tools and the internet will make your life much easier for this.
This is where your “jeweler’s eye” comes into play and when you should be very meticulous on details.
You have to search for all small details on the surface (polishing/finishing), have a close look at the setting, the stamping, and the symmetry of the shapes.
Polishing/finishing
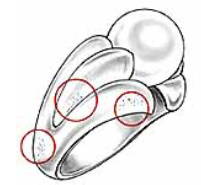
First, look inside the rings or under the jewels and search for unpolished or unfinished places.
This will give you an excellent general idea about the attention that has been paid by the polisher on his job.
A good quality jewel should be polished or properly finished everywhere, in all corners.
All the sanding and grinding lines should be removed to leave a perfectly smooth surface.
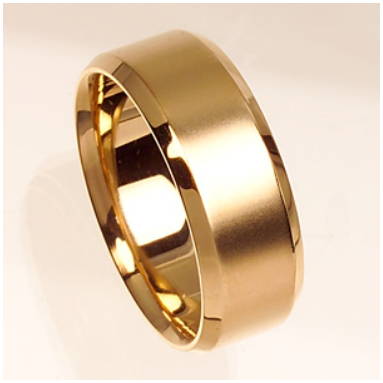
If a satin finish, a brushed or a sandblast finish has been done, they should look perfectly uniform in intensity and direction.
Changes between the polished finish and other textures should be sharp and clean unless the intention were to produce a fade-out effect.

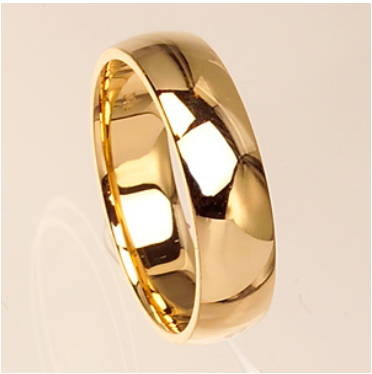
To judge the quality of a polished surface, move it slowly under a source of light (preferably white) and try to “feel” the surface, using the light’s reflection, to find some little scratches and imperfections.
It usually takes a while for people to be able to look properly at a polished surface: it’s normal, our eyes are not used to search for such details in everyday life.
When you get it, you’ll notice the difference, and you’ll probably get that professional deformation of always trying to find defects on polished surfaces… it comes with the job!

Some kinds of imperfection that can occur are cracks, holes, and “frosting.”
Uncontrolled casting parameters cause all of those defects.

You may also pay close attention to the settings: have a look inside the prongs, inside the “mise en pierre” and all those places to see if they have been polished or finished in some way.
Very few companies go this far today!
One last thing: the respect of the original shape of the design.
Flats should remain flat with defined edges (just rounded up a little bit in order to feel smooth), curves should be smooth and constant (not wavy when you make to light flow on the surface) and the general lines and details of the design should be nice and not rounded up to much by excessive polishing.
Setting
Another essential part of a jewel when it comes to craftsmanship is the setting.
Are the stones appropriately set?
Read here by set properly: straight in all angles, the metal holding the stones in place is thick enough, the stones shouldn’t move in the setting, if it is a prong the setting the prongs shouldn’t be too big, too small, or disproportionate with each other.

For a channel setting, there shouldn’t be any space between the stones if they are square or space should be equal if they are from other shapes.
One last thing, the tables of all the stones should be straight with each other or follow the radius in case they are set on a radius.
Stamping
Now that we know more about the stamping regulations for the precious metals let’s see how it should be done for it to be nice in a technical way.
It should be centered on the piece, and straight.
Note that “centered” for a ring doesn’t necessarily mean right at the bottom of the shank, since jewelers usually leave that space free in case the ring needs a size adjustment.
All the letters and numbers should have the same dept, and no parts of them should be missing.
One last thing: the piece shouldn’t be left distorted by the stamping.
Usually, the marking should be done halfway during the finishing process so the polishers can re-calibrate the jewel for it to look straight and symmetrical in all angles after the stamping is done.
But now that the access to laser engraving technologies is much easier, the mechanical stamping using steel punches is getting rarer and rarer.
This kind of the process makes the stamping, then called engraving, much faster and easier to control.
The symmetry of the shape
Well, the piece should look straight, very straight.
If it is a ring, the inside must be perfectly round.
The surfaces have to be well balanced and equal or regular everywhere.
You will have to train your eyes to split everything in half mentally and compare the 2 parts.
Like the surface appreciations, it’s another professional deformation that you might get stuck with!
This aspect of the quality appreciation is in fact closely related to the polishing and finishing.
A note on the thickness
The thicknesses should be regular and sufficient: so many rings have a shank that goes as thin as half a millimeter!
Under those conditions (and especially if we are talking about yellow gold or platinum), the jewel can already easily get deformed, so, as a buying prospect, it is pretty much a no go.
The minimum thickness for a ring should be one millimeter, but this also depends, as we read above, on the nature of the metal (white gold is quite hard, so a bit thinner shank could do), and on the ring size: a size 15 (quite big!) will be quite fragile with that 1 mm thickness.
A thickness of around 1.5 to 2 millimeters is a sign of good quality for a size 9 ring…
Use your judgment!
Or if you get a center stone with a smaller face-up appearance, like an Emerald cut, you could then balance the equation by putting 2 Trilliant cuts outside your center stone.
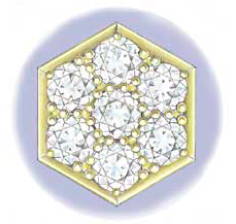
Not only are there quite a few combinations between center stone and side stones that will give you a massive and impressive face-up appearance, but you can also go for small melees to go around these center stones.
Melees – small 1mm round diamonds like in the picture below:
Adding this up to this already impressive face-up appearance will make it even better!
And then, boom!
Pay less and get more!